Submitted by Jonathan on 17 September 2009 - 11:30pm
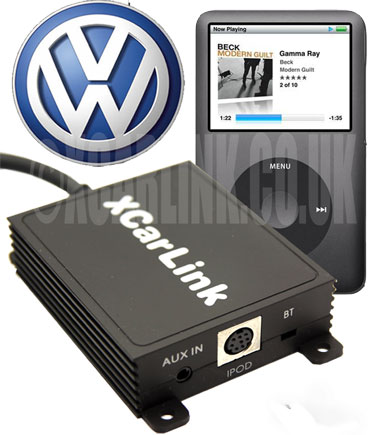
The XCarLink adaptor is simply a box which interfaces between the iPod or iPhone and the CD radio head unit. The adaptor unit about the size of four match boxes and has two cables leading from it. One of the cables connects directly to the iPod or iPhone, the other to the CD changer port on the back of the head unit.
These instructions explain how I fitted the XCarLink adaptor into my VW Golf V (MK 5) TDI SE (2005)
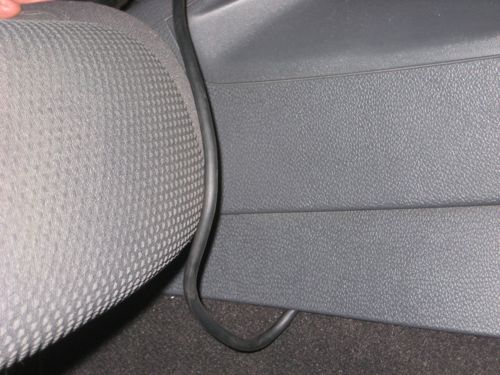
The cable from the adaptor box plugs straight into the available CD changer socket on the back of the head unit. Before connecting, I ran the cable from the bottom of the centre console to behind the CD radio unit. In order to do this, the cigarette lighter and ashtray needs to be removed.
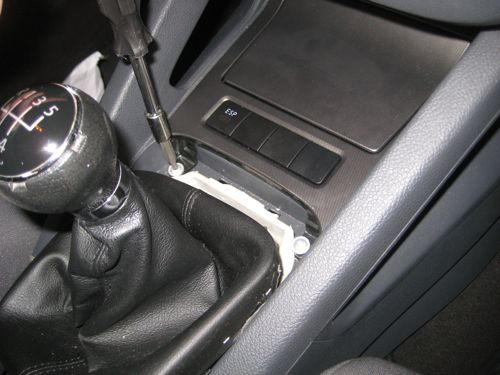
- Remove the gearstick cover. It pops out easily with little force needed.
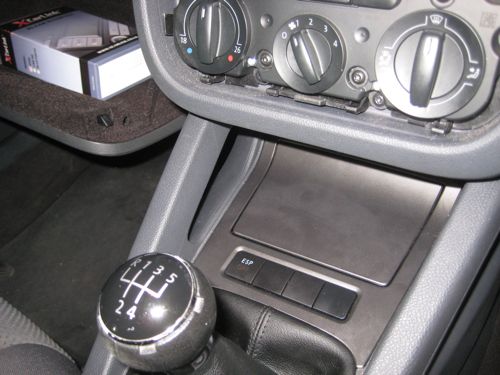
- Beneath the cover reveals two screws. Remove these and the ashtray and cigarette lighter unit can be lifted up and out. You'll need to disconnect the cigarette lighter cable and ESP cable (if fitted.)
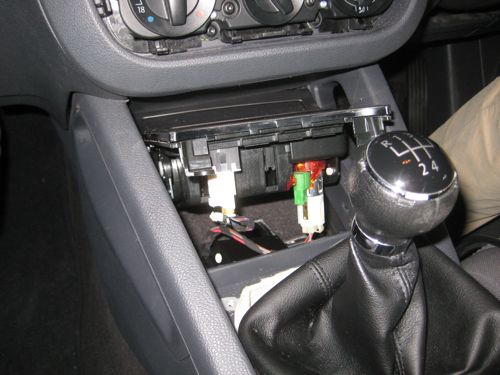
- I identified a suitable spot for locating the XCarLink interface unit beneath the ashtray and cigarette lighter unit.
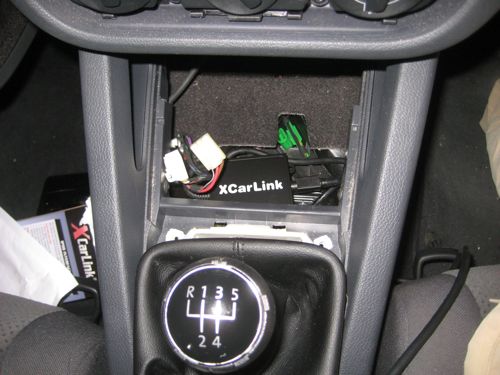
- I routed the cable from the XCarLink interface box to the iPod / iPhone down a gap between the carpet and the centre console.
- Once all the cables are in place, switch on the CD radio and test the setup before putting the gearstick cover, centre console and dashboard back together.
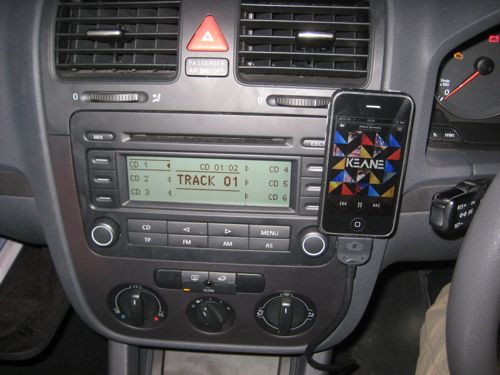
- I use a piece of velco (the soft furry piece attached the iPhone) and the hooks attached the the dashboard. The iPhone isn't very heavy and the velco works well to support the iPhone in an upright position and within easy sight and reach for both the driver and passenger.
This was an easy install and took less than 45 minutes to complete from start to finish.
Good luck and enjoy!
UPDATE
I've checked out new iPhone accessories since posting this blog to find a suitable mounting system for the iPhone. See my later blog entry for more.
Submitted by Jonathan on 17 September 2009 - 10:58pm
I spent this evening learning how to remove the CD / Radio head unit from my VW Golf V (MK 5) as I intended to fit the XCarLink iPod adaptor. I couldn't find much information about how to remove the radio, so thought I'd best fill the gap. I've added as many photographs as possible to illustrate each step.
My car is a VW Golf TDI SE (2005)
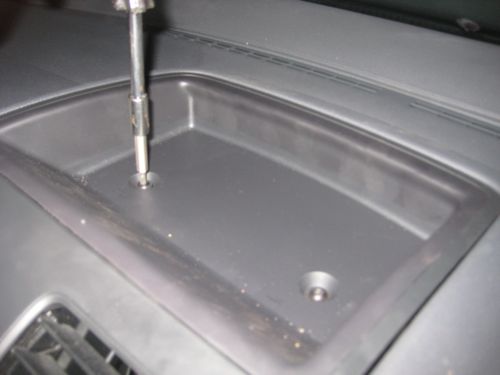
- Remove the rubber anti-slip mat which you'll find in the tray on the top of the dashboard. It can be taken out by gripping between your fingers and lifting.
- Underneath the mat there are two screws which have Torx screw heads. You'll need to have some Torx screwdrivers to unscrew both screws.
- Gently prize the tray away from the dashboard. I found a couple of flat-head screwdrivers wedged in at each corner seemed to do the trick.
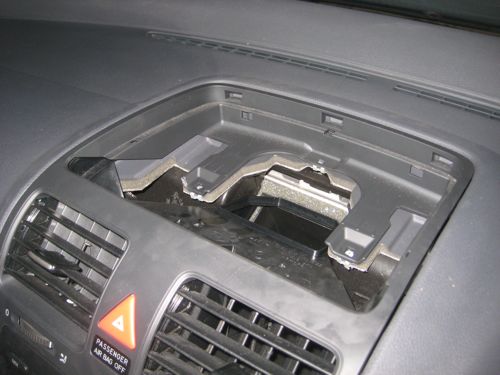
- The top most section of the instrument facia can now be removed. This contains the ventilation grills. Lifting the section from the back, then work your way forward. Again, gentle persuasion with a flat-head screwdriver helped. The section is held firmly at the front with clips which can be released by sliding the panel upwards towards the roof. The section then separates and it can be lifted and placed to one side. Note that you can't remove it completely as a cable prevents you from doing so.
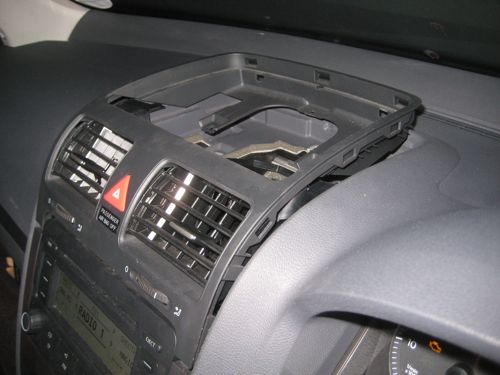
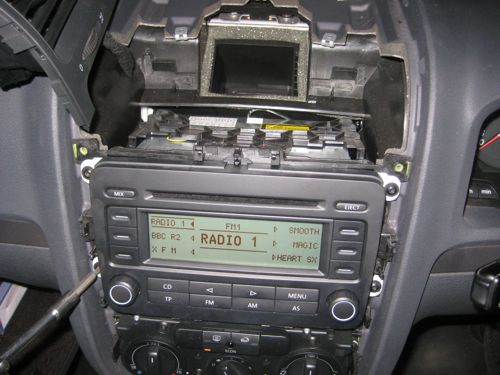
- Two further screws are uncovered. Unscrew these to allow the front facia from around the CD radio head unit to be taken off. Again, working from the top, gently prize the facia forward working from top to bottom down one of the sides.
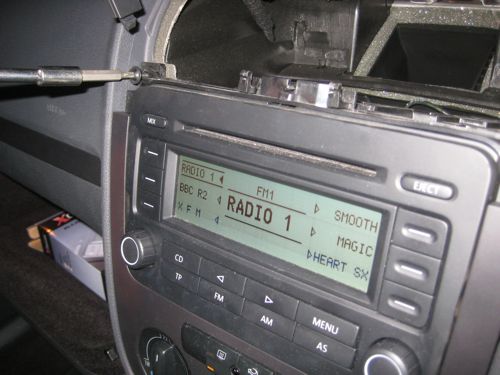
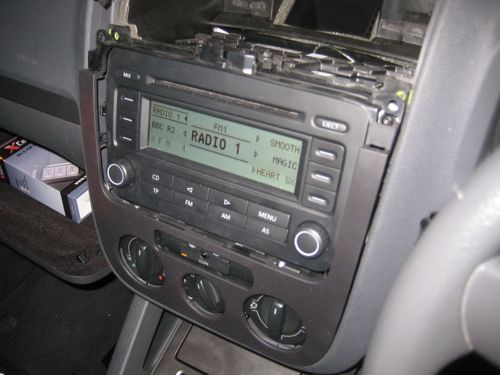
- Four Torx screws hold the CD radio head unit in place. Once again, remove these screws and the CD radio can be pulled forwards.
After removing the CD radio head unit, I set about installing the XCarLink adaptor. Read my instructions for fitting the XCarLink adaptor and cables.


