Error message

  • Warning: "continue" targeting switch is equivalent to "break". Did you mean to use "continue 2"? in include_once() (line 1389 of /Library/Server/Web/Data/Sites/Documents/jonathansblog/includes/bootstrap.inc).
  • Warning: "continue" targeting switch is equivalent to "break". Did you mean to use "continue 2"? in require_once() (line 341 of /Library/Server/Web/Data/Sites/Documents/jonathansblog/includes/module.inc).

Warning message

The service having id "facebook_widget" is missing, reactivate its module or save again the list of services.

Jonathan's blog

2013 Highlights and Hopes for 2014

I'm aiming for this to be my first venture into writing about my highlights in 2013 and hopes for 2014.

I'm hoping this will be an ongoing project, an annual event which I hope to inspire my pupils to write their own. Here goes...

Highlights in 2013

1. Gaining a headship. Having come to terms with knowing that one day I'll be leaving the amazing school that is Kings Road Primary School, I began my quest to find the school for my first headship. This wasn't a race, nor did I rush. I was fairly choosy too simply because I wanted to ensure that I could bring something of value to the community and ensure I could make a difference. After visiting Ivy Chimneys Primary School and meeting the governors, staff and children at interview, it was clear in my mind (and heart) that this was the school where I wanted to be the Head Teacher. Make no mistake, this role is an enormous privilege and after just one term, already this feels like home.

2. Surviving Ofsted. In no more than 8 weeks, I received the call from the Lead Inspector. To be fair, this wasn't unexpected. I started in September knowing that an Ofsted inspection was already overdue and that with a new leader in post, the inspection was imminent. Whilst I had been in the job only 8 weeks, others were very familiar with the school and I realised that by working as a team, we could still be successful. We worked hard, defended hard and achieved the outcome which reflected the school and the journey it had already commenced.

3. A bumper year of growing. Well, not so much me, but certainly the fruits and vegetables grown both at home in the greenhouse and garden, and at our allotment. Whilst not everything was a huge success, there was much to be celebrated, consumed and enjoyed! The year started with the harvest of garlic (planted as cloves the previous year during early Winter.) We are still cooking with this garlic whilst this years' crop is already growing. Since then we've grown and eaten potatoes, tomatoes, courgettes, spring onion, parsnip, leeks, radish, beetroot, lettuce, runner beans, broad beans, chard, sweetcorn, grapes, apples, strawberries, raspberries, red currants, blackcurrents, gooseberries.

My wife is a terrific cook not only because she is cooks everything that I grow, but she understands and experiments with flavours and so is very creative in the kitchen. 

However, what I love most is sharing this produce with my friends and family for them to enjoy.

How much growing I'll fit in this year remains to be seen.

4. Travel. I'm very lucky to have a wife who enjoys travel so much. Whilst travel isn't particularly compatible with gardening (especially during Spring and Summer months) it has broadened my perspective on the world on the world in which we live. Thinking back to 2009, Sarah and I travelled to the Middle East and saw some spectacular sights which are simply off-limits to tourists for now. This year we have been fortunate to have visited Las Vegas, Cyprus, Montreal and Antigua. We flown some miles, but we shared some amazing time together too.

5. Raspberry Pi. It has been a stella year for Raspberry Pi development. I'm excited by technology and always have been. The Raspberry Pi computer has unlocked a wealth of opportunities, and not just for the self-confessed geek. The opportunities for children to fully understand computing and programming has returned to the curriculum and this, I believe, is a tremendous step forward. I've attended four Raspberry Jam events, the first of which was held in January in London and where I met new friends, Anne, Jonathan and Maddie. They are now firm friends on the Raspberry Jam circuit and see them at each event. At the most recent event in December, I had 8 pupils from Ivy Chimneys Primary School in tow and they absolutely loved it! Watching them gain so much enjoyment and excitement from programming a Raspberry Pi and switching on and off LEDs was a real highlight.

Hopes for 2014

1. Stay fit and healthy. I may join my super-enthusiastic wife who has managed to squeeze regular gym sessions into her already hectic life. Truth be told, I'm not much of a gym person and would rather have a good workout on the allotment where digging and lugging soil is really quite physical. I miss being on the allotment but as soon as this wet weather moves on, I'll be there.

2. New build. No, not me! We have come to the stage where we seriously need to consider make decisions on an extension to our house. We bought our house back in 2010 with every intention of replacing the not-so-fab single brick extension. It needs to go. We have had quotes and ideas, but none seem to have excited us enough to say 'yes'. It will be the year of the house (and garden) with our hearts set on a bi-fold view onto a cottage garden. Watch this space!

3. Become a better Head Teacher. I know I've only just started in this new role but as someone who has always believed in self-evaluation and reflection, these are the best tools for developing and improving performance. Certainly I have a desire to offer the very best opportunities for our children and to enable them to have a stronger and louder 'pupil voice'. I also want to ensure our staff receive great CPD and work more collaboratively. There are some big developments ahead with the new curriculum and this will need everyone's attention and commitment and if there's one thing for certain, it can't be done alone.

4. Blog and Tweet more. In many of the highlights/hopes blogs that I've read, the common theme amongst bloggers is to tweet less!  However, I know I don't contribute nearly enough about my own practice and this is what I'm hoping to change. Linked very closely to item 3 above, I used to use my blog as an vehicle for reflection and whether it's a lack of time or inclination, I don't know, I've written far fewer blogs than I have done previously. I tweet regularly from the Ivy Chimneys twitter account, but very little activity from my own account. I'm working on it!

5. End by eleven. Last year I spent too many hours working late into the night and early hours of the morning. I'm enthusiastic and passionate about work, I enjoy it, so find it very difficult to put the computer to sleep and myself to bed. I also seemingly get a 'second wind' at about 9pm which means I'm good to go for another 3-4 hours. This is all fine until morning arrives and the enthusiasm to jump out of bed is somewhat nonexistent. Must try harder!


So that's it. Just five of each. What are your top five highlights of 2013 and hopes for 2014?

Happy New Year.

Pi Powered Presentation Screen

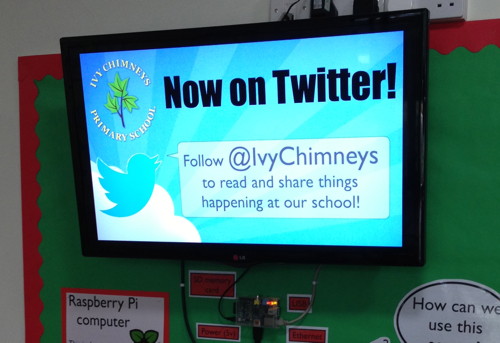
One of the first developments as Head Teacher at my new school, Ivy Chimneys Primary School is to introduce a large LED screen in the foyer area to display information about the school and to share children's work.

After a summer of exploring lots of digital signage solutions, many of which were very pricey and were either far too complex for what I needed to achieve, or didn't quite fit the bill.

My specification was simple:

* affordable solution, meaning high impact on learners, low impact on budget.

* the screen needs to reflect the life of the school, displaying key messages and to share children's work.

* maintaining the screen needed to be simple, so that uploading new 'pages' is quick and easy.

* both children and staff are able to administer the screen.

I'm a true believer in 'pupil voice' and the very reason schools exist is to provide opportunities for children to learn new skills. One of the best ways to achieve this is to involve them in the process of learning at every opportunity. I am also intent on building a community of learners who are thinkers and who are able to reflect on their successes and be self-critical on finding improvements too. 

When children feel success, they should have a place for celebrating and feeling proud of their achievements. This screen is just one of those places.

The Solution

It occurred to me that the Raspberry Pi costing just £25 coupled with a large 32" LED screen would be one of the cheapest options available. Of course the Raspberry Pi alone isn't the solution, because it is just the computer and operating system. The Raspberry Pi has several HUGE advantages:

- cost effective - only £25.

- tiny size (footprint no bigger than a credit card)

- negligible power consumption (just 2 watts)

- onboard HDMI graphics adaptor which makes connectivity very straightforward.

- runs Raspbian Wheezy which is a flavour of Debian - a very reliable operating system. 
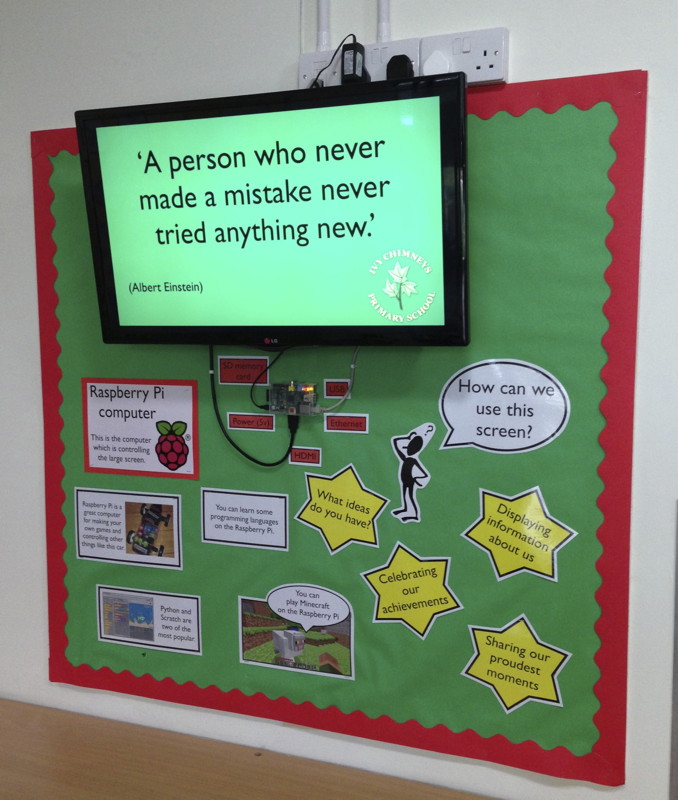
I bought an LG 32" LED HD TV from Richer Sounds, Romford with a wall mount bracket. It has all the standard connections but of particular importance are the two HDMI connectors. A standard HDMI cable connects the Raspberry Pi to the TV. 

I did note that the TV also has a USB socket, which provides enough power to run the Raspberry Pi, but unfortunately this port only provides power when the screen is on, i.e. not in standby. A real pity since the whole project would then only need one 240v plug socket.

When I started this project, I knew I wanted children to be able to engage with the technology and an earlier decision was to display the Raspberry Pi rather than to tuck it carefully, out of sight, which would have been so easy to do.

Instead, I choose a transparent case, and mounted it on the wall beneath the screen. As you can see in the photograph, I have even labelled the ports to make the wall display as informative as possible. Only 1 week into the new term, and children have been drawn to want to find out more about how it all works.

Software

After much testing of different operating systems, starting first with the RaspBMC, I opted to run the Debian Wheezy installation. The RaspBMC is an XBMC Media Centre system which offers plenty of advantages. I initially used the Screensaver plugin to load images from a folder and present them based on the timing settings selected. This would be an ideal solution, especially since RaspBMC also supports AirPlay technology enabling the screen to take a AirPlay feed from an iPhone or iPad.

However, having found a similar solution using the X windows system in Raspbian Wheezy, I felt that I had greater flexibility in using the Pi to perform other tasks, not just the screensaver. I also had greater control over finding a mechanism of being able to access the folder of images across the network and reloading the image 'set' during the slideshow.

In the end, Raspbian Wheezy was the operating system of choice. I enabled a couple of options from the 

raspi-config page

Start desktop on boot? - YES

Enable SSH? - YES

Display

I discovered that an image viewer application called 'feh'  would be ideal for this project. Feh can run from the command line and has several configuration settings to tell it how to behave. Within the config you simply point feh to a folder from which to display images. Simple.

1. First install feh.

sudo apt-get install feh

2. To start the slideshow, simply run the command:

/usr/bin/feh --quiet --recursive --randomize --full-screen \ --slideshow-delay 5 /home/pi/frame/photos/

the commands are fairly self-explanatory. The digit '5' tells feh how many seconds to wait before loading the next image. 

Because the application 'feh' runs in the X windows environment (startx) the mouse cursor was visible on the screen whilst the photos were being displayed. I found a way around this, by installing 'unclutter'

sudo apt-get install unclutter

Uploading photos to Pi

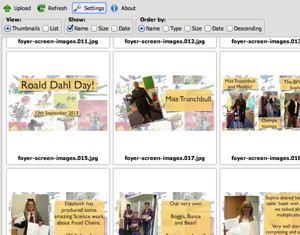
This was solved by using a pre-packaged PHP application called KCFinder. What's really nice about this tool is its ease of install and simplicity of operation. All I wanted was a tool which was web based, enabling anyone with a web browser to upload & delete images on the Pi.
First I needed to install the Apache webserver.

apt-get install apache2

and also the PHP interpreter with GD for graphics support.

apt-get install php5-gdI then downloaded and copied across the KCFinder files.

I configured the KCFinder config file to ensure the upload directory was pointing to the same folder that feh used to load the images for slideshow.

Bingo! When I go to the Pi hosted web address of KCFinder, I can simply drag and drop images into the browser window to upload. What's more, as the images are uploaded, thumbnails are created which allows me to see which image is which.
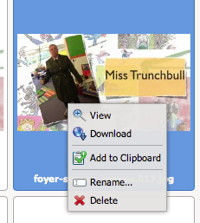
I can also delete images from this folder, so when it comes to deciding which images to keep in the slideshow, this is quite straightforward.


One thing to be aware of, however, is that feh loads its images on startup, when the application is first run. This means that if you add images to the folder, feh doesn't know about them unless you restart the application.

This led me to script feh. I needed to do this for several reasons, one, so that it automatically starts on boot. Second, to enable me to restart after adding or removing images from the slideshow folder.

I ended up with two scripts. 

starting the slideshow:

#!/bin/sh
#
# Script to run Digital Signage Solution using Feh
# jonathan@learningspaces.net
#
# hide the cursor after 15 seconds
/usr/bin/unclutter -idle 15 &

# Start slide show
/usr/bin/feh --quiet --recursive --randomize --full-screen --slideshow-delay 7 /xxx/xxx/foyer/upload/files/ &

exit 0


reloading the slideshow:

#!/bin/sh
#
# Script to run Digital Signage Solution using Feh
# jonathan@learningspaces.net

#export DISPLAY=:0

# Stop the currently running Slide show

kill `pgrep -f "feh"`

sleep 10s

# Start slide show
/usr/bin/feh --quiet --recursive --randomize --full-screen --slideshow-delay 7 /xxx/xxx/foyer/upload/files/ &

exit 0

And that's it. That should give you a fully working digital signage system based on a simple slideshow of images.

There's more development that I'd like to explore, including using some push switches on the GPIO ports to run a set of scripts for perhaps displaying a particularly screen. Maybe the week's house points chart, or weather information etc. I also have a Pi Camera which I would like to hook up, and perhaps it could be accessed through pushing another button? Who knows. With the Raspberry Pi powering the screen, the possibilities are endless, unlike many of the corporate solutions which tend to be quite finite.

Exciting possibilities ahead. If you have a really fabulous idea to develop the Pi Screen further, do let me know by adding a comment below.


More products can be found on the Farnell website, see Vishay and Panasonic

Simple, Smart, Small Bluetooth Music System to your Speakers

One of my bug bears is having plugin my phone into a cable to listen to music. With a cable plugged in to the phone, it becomes "tethered" to my desk and therefore don't have quite the same freedoms to use it as a phone.

The Avantree Roxa Bluetooth Receiver works brilliantly if you have a set of wired speakers or perhaps a hifi system which is set up on the opposite side of the room from where you happen to be sitting.

The Avantree is so easy to setup with only two very logical steps:

1. Plug the Avantree into a wall socket.

2. Pair your bluetooth capable device with the Avantree. 

and that's it!

The Avantree also has a USB socket which provides sufficient power (1 Amp) for charging iPhones, iPads and any other device that can be charged over USB.

This really is a very capable device and one that would be at home in any home or office.

I got this from MobileFun where there are lots more smartphone accessories.

JBL OnBeat Micro Lightning Speaker Dock

Last week, I ordered a speaker dock system for my iPhone 5 with the lightning connector. Nearly a year after the release of the iPhone 5, there are still only a few speaker dock systems using the now-not-so-new lightning connector.

JBL are renowned for designing speaker systems which produce high quality sound. This is no exception.

As a Head Teacher, I've been in lots of classrooms and observed lots of lessons and fun activities where teachers want to play music from their iPhones, but instead resort to the complexities of having to copy the sound file to a computer in order to burn a CD. Schools need kit like this to make teaching and using ICT resources so much simpler. Dock your iPhone and press play should be as difficult as it gets.

I'm really liking this speaker dock. It comes well equipped with an AC supply adapter, USB port on the back for connecting other devices, perhaps with the 30-pin dock connector, and also a 3.5 stereo jack as an input from another audio source. This is a very versatile speaker docking system.

Removing the cover on the base of the unit reveals a battery compartment, requiring 4 AAA batteries for it to operate wirelessly.

This is a must have item for any home or classroom!


Fitbit - tracking your way to a healthy future

If there was ever an intuitive and well packaged product, the Fitbit must surely be it. Whenever I hear Fitbit, I do think of Wizbit, a children's television programme for children. Like Wizbit was the entertainment programme for children, Fitbit is the tracking tool for getting and staying healthy.

Curiously enough, I was setting this device up with my 4 year old nephew. Whilst he wasn't reading all the onscreen questions during setup, he knew exactly how to get through the config pages and use it. Furthermore, he understood the small screen display on the Fitbit itself.

So what is Fitbit?

There are three parts.

1. The wearable Fitbit device

2. The Fitbit app 

3. Fitbit website (optional)

The Fitbit device is a neat little package, no longer than four centimeters and two centimeters across. It comes with a clip-on case which not only protects the device but is super grippy and holds onto the clothing and gives you a confidence that this isn't going anywhere. It's also incredibly light, and you wouldn't notice carrying this around with you. 


The Fitbit device pairs with a smartphone, using the Fitbit app. It is compatible with Windows and Mac computers, syncing wirelessly and displaying data collected through a browser based 'Dashboard' interface. For smartphones and handheld devices, there is a Fitbit app, available for some Android smartphones, iPhones, iPads, iPod Touch.

As you can see in the screenshot (right) a whole raft of data is captured and tracked. What I love most, is that the synchronisation happens autonomously and discreetly. You wouldn't be aware that it's happening which is a very good thing, because that's not what I care about. What I'm interested in is analysing and comparing data as it is collected.

I love the graph that's generated (see below) allows lots of parameters to be compared and contrasted. The 'Very Active Minutes' is particularly enlightening.

I'm really delighted with this new gadget and it will be the perfect companion to clip to my belt to track my daily activities. Not only does it capture physical activity, but also rest time too. You can add drink stops too, but you'll need to manually add this data to the app or website.


I cannot wait for tomorrow. I'll clip on in the morning and get on with the jobs that lie ahead. 

I'm going to try cycling, motorcycling and driving as well. I'll be interested to note whether Fitbit can distinguish between the vibration on a bike, road surface and actual steps (walking.)

In summary, I don't think I've ever used a product which is as intuitive as Fitbit. It's great. 5 minutes of setup, straight out of the packaging (which has also been given quite a lot of thought!) and I was up and running. Given this device is technically quite complex in terms of small screen = minimal user interface, synchronising wirelessly yet small enough to be light and portable, this really is quite an achievement. To the untrained eye, this is both seamless and gorgeous. I love it.

Are you interested in getting a Fitbit

Modifying Raspberry Pi volumes shared over AFP

I needed to find a way of accessing other folders on my Raspberry Pi other than just the standard "home directory"

I edited a file "/etc/netatalk/AppleVolumes.default"

and added the line:

/var/www                "WWW"

at the very end of the file, see below:


# By default all users have access to their home directories.

~/                      "Home Directory"
/var/www                "WWW"
 
The folder /var/www is now available through my AFP share as 'WWW' unsurprisingly!


Pea Twinkle - the garden pea

Apart from having a delightful name, Pea Twinkle, has lived up to expectation and has just provided us with our first crop of garden peas. They taste amazing, picked and eaten raw straight from the plant.

My wife does fantastic things in the kitchen, and she cooked a pretty special risotto using peas and bacon. Wow. Amazing texture and flavours.

Given the garden pea is such an easy vegetable to grow and yet, it doesn't take up much space. It also has the added benefit of producing beautiful white flowers which is not unattractive in any garden.

Crumbly Compost from a Round Riddle

A sieve is an important addition to any gardener. This sieve or riddle, which is its proper name from Hill & Sons is just perfect for the job of turning home made compost into fine, smooth, soft and fluffy soil.

The downside of sieving is that it is back breaking work. I've discovered this can be made easier, simply by sieving at waist height using the wheelbarrow as a base.

This 18" riddle made from beechwood using traditional techniques is an ideal tool and produces a fine, light and earthy soil.

Here's the sieved soil that I'm using to fill this raised bed, on top of a layer of manure.

Mini Polytunnel - allotment netting to protect cauliflowers, kale, cabbage

All sorts of creations can be seen across the Chigwell Allotments for keeping birds & butterflies from attacking vegetables, particularly those in the brassica family, which somehow tend to be more morish for these creatures.

I think one of the best ways is to create a mini polytunnel type structure from polypipe and scaffold netting. I built five of these this week, which sit on top of the raised beds. Here's how.

1. Cut three pieces of wood which matches the length of the area you wish to cover, or in my case the length of the raised bed. Cut two pieces of wood to match the width of the area or raised bed. I wanted my frames to sit on the wooden edges of the raised bed rather than directly on the soil. I figure the wooden frame is much less prone to rot if sat above the soil.

2. Take the three longest pieces and prepare to drill holes which will be used to push the polypipe through, forming the arching structure. Two holes are drilled at the ends of each piece of wood, 5cm from the end. Each support should be between no closer than 50cm and further than 80cm along the length. Use this as a guide for working out the number of supports spaced equally along its length.

3. Drill holes using a drill bit which matches the diameter of the pipe you are using. There are lots of different diameter pipes. I'm using 25mm and therefore have used a 25mm cutter. It's important this is a tight fit as this will add strength and ensure stability. Drill half way through, turn the piece over and drill from the other side to ensure the wood doesn't split.

The third piece is used as the supporting strut to keep the pipes upright and more stable.

3. This frame is screwed together in each of the corners.

4. Cut the lengths of pipe to form the arching structure. This isn't as easy as it sounds particularly when working alone and with the pipe already coiled. Using two concrete blocks, I rigged up a system where one end of the pipe could be held whilst I measured and cut the pipe. I discovered the secateurs are actually great at cutting plastic pipe.


You could calculate the lengths of pipe required using this simple formula, but this is only a rough approximation as it very much depends on the height of the tunnel that you require and therefore the imperfect semicircle that is formed.

circumference of a circle = pi x diameter

therefore, pi (3.14) x (width of bed)  divided by 2 will give approx. circumference of the semi circle.

In the case of my raised bed, 117cm wide, this became

(3.14 x 117) / 2 = 183cm

I actually cut the pipe at lengths of 200cm, this allowed for the additional height. Cutting one and creating the arch gives you a very good idea of what to expect when all put together.

5. With all the pieces of pipe cut to the same length, these needed to be threaded through the third length of wood, with approximately the same length of pipe either side.

6. Place all the ends of the pipe into the holes in the frame.

Now all that is required is to cover the frame with the netting you have. I'm using recycled scaffold netting, but that's entirely up to you. I weighted the netting down using some bricks, along the length and width of the raised bed.

Job done.

Travel Tidy Cables

Whenever I travel with technology of any kind, I always find myself carrying a nest of handy cables and adapters. Clearly, when travelling light and with hand luggage, smaller and lighter are the two key words.

So here is my latest technical addition in that quest for light-weight and compact.

Raspberry Pi Retractable RJ-45 Ethernet Cable

Despite most hotels offering wifi solutions. I still find myself plugging in occasionally. This is exactly what you need. 

Tidy Desk, Tidy Mind!

My MacBook Pro connects directly to an Apple Cinema Screen. Whilst my Cinema screen is somewhat old with a standard DVI connector, my MacBook uses the Ultra-cool Thunderbolt interface. 

As many Mac fans will know, the early Cinema screens has a multitude of connectors all clustered together at the end of it;s single, reasonably bulky cable. I have a DVI to Thunderbolt connector, but I disliked the array of other connectors sprawled across my desk - quite unnecessarily and each connector was a perfect habitat for dust. 

Having spotted this Thunderbolt extension cable, I wanted to see if this solved my issues. 

All I have now on my desk are three connectors. Power. Ethernet. Thunderbolt.

If you are looking to do something similar, this is what you are looking for!

Dr. Bott 2m Mini DisplayPort Extension


(ps. this doesn't prevent the nest of cables tucked away, tangled but crucially out of sight, behind the desk!)

Portable Bluetooth speaker - the Veho 360 M4

As many of you know, I often retreat to the sanctuary of my allotment and greenhouse at every opportunity. I love its peacefulness and love the social nature of meeting like-minded gardeners. However, there are times when I miss listening to a radio station, or music and whilst some use small portable radios, I've opted for a portable Bluetooth speaker which interfaces with my iPod or iPhone. It's small, compact and has an inbuilt rechargeable battery which makes powering it so convenient and easy to keep powered.

One major weakness of small speaker systems is the lack of bass and this isn't completely solved by the Veho. Its small size makes it almost impossible to overcome the problem of producing deep, rich bass notes, however, it makes a very respectable attempt at trying to.

The Veho speaker system is very well equipped:

  • rechargeable battery pack (built in)
  • micro USB for charging
  • audio in jack socket (3.5)
  • Bluetooth connectivity
  • micro SD card slot for playing music directly from memory storage

The controls on top of this unit are also well designed, with volume, skip forward / back, and power (both stop and on/off.)

Raspberry Pi Power Supply

I've been running my Raspberry Pi server for the past 9 months now. It's been a tremendous success running server / device monitoring & downtime alert software called PHP Server Monitor. As the name suggests it is written in PHP which makes the software very easy to customise and tweak. Currently, PHP Server Monitor is configured to send emails when any one of the devices it is monitoring fails to respond. It also sends an email alert when the device becomes available again.

Here are just some of the devices being monitored. I have obscured IP addresses for security reasons.

Another piece of software running on the Raspberry Pi is 'thermd', a 1-wire device logging and graphing tool written in Perl. I have 1-wire temperature and humidity sensors dotted around my home and garden, monitoring freezer / fridge temperature, front room, upstairs, heating system temperature. Outdoors, I have data from outside temperature sensors, greenhouse, propagator, cold frame sensors. Coupled with a rain gauge and light meter, I have plenty of data points being made available across the Internet to my iPhone wherever I am. The home automation software also hooks into this data to make decisions on whether to heat the house, water the plants in the greenhouse, turns lights on etc. The Raspberry Pi is switched on 24/7 and is powered by the sun.

Here is the graph produced by thermd. This is just displaying temperature sensors located outside.

Solar energy is stored in large batteries and a 12V feed runs via a multi-way cigarette socket. The Raspberry Pi USB cigarette lighter adaptor is plugged in to this multi-way adaptor. You can find 12V USB chargers from most places, but I found this one by following this link to Raspberry Pi Power Supply


Desk Pets - the gadgeteers favourite pet

As a Deputy Head Teacher of a primary school in Essex, I have become renowned for my cupboard of gadgets, electronic toys and gizmos. The collection started from a humble beginning, researching the interaction between young children and toys, looking specifically at the learning that takes place. It was a fun(!) research project and gave me plenty of scope to try lots of different types of toy.

Of course, the electronic gadgets now feature in my teaching, with Control Technology very much at the forefront of the ICT curriculum. With the children playing with iPads, building roller coaster simulations on the Mac, using Hex-bugs, roamers, bee-bots, and the like, there are always plenty of devices to explore.

The latest addition to my "collection" is the DeskPet which is an iPad / iPhone accessory.

The children have responded well to using the DeskPet which is essentially controlled using an iPhone app with a transmitter plugged into the headphone jack. This was a surprise and had anticipated something plugged into the Dock connector. I suppose using the headphone jack makes the DeskPet quite versatile and therefore not limited to iOS devices. Weirdly, I couldn't get DeskPet to function initially, but then realised that both my iPad and iPhone were muted. Control signals to the DeskPet must be in the form of sound waves, which are completely inaudible, so presumably operating at the very high frequencies.

The children have really warmed to the DeskPet and love setting themselves challenges of following courses and routes. This is not only a great addition to my cupboard, but one that is very popular too!

Networking with the Raspberry Pi - Apple File Protocol changing its name

When I installed my first Raspberry Pi and enabled the Apple File Protocol (AFP) so that I could connect to its file system from my Mac, all was well. It defaulted to using it's own name "raspberrypi"

However, with two Raspberry Pi's on the same network, I needed to identify them individually.

All that is required is a file to be added to the file:

/etc/avahi/services/afpd.service

If you don't have one of those, simply create it:

sudo pico /etc/avahi/services/afpd.service

and copy and paste the following:


   RPi-0
   
      _afpovertcp._tcp
     
548    


In the line beginning:   <name replace-wildcards="yes">%h</name>
replace the %h with the unique name you have decided upon:
 
<name replace-wildcards="yes">RPi-0</name>


Raspberry Pi and PiFace

My PiFace arrived last week and this was the first time I've had a proper play using it with the Raspberry Pi.

I needed to do some things first to get it working, and I thought I'd document it here for future reference. Your Raspberry Pi will need to be connected to the Internet for this install.

INSTALL

1. Firstly, the Raspberry Pi interfaces with the PiFace through SPI, so this will need enabling.

sudo pico etc/modprobe.d/raspi-blacklist.conf

Insert a # at the beginning of the line

 blacklist spi-bcm2708

like so
 #blacklist spi-bcm2708
 
2. Second, install the PiFace Digital libraries and change the permissions of the SPI interface. Luckily, running this command will automate the entire process.

sudo apt-get update

wget -O - http://pi.cs.man.ac.uk/download/install.txt | bash

And reboot your Pi once installed.

sudo reboot

TESTING

Use the PiFace emulator to test the input and outputs for the PiFace board.

You'll need to log back into your Raspberry Pi and start the GUI environment (startx)

Open the Terminal application and type:

piface/scripts/piface-emulator

This will enable you to test the inputs are recognised and the outputs software controllable.

USING PIFACE IN PYTHON

I was itching to begin controlling the PiFace board from within Python. I wrote a simple program to demonstrate it working.

import piface.pfio as piface
piface.init()
switch7 = piface.digital_read(7)
print switch7
if switch7 > 0:
   piface.digital_write(1,1)

This code simply switches output one on if switch7 is closed.

iPad Mini case

The iPad Mini is designed to be carried everywhere. It wants to just slip into a small bag. Now that my wife uses hers to read, it gets put in her handbag wherever she goes. As with all Apple products, they look gorgeous naked and dreadful when fully clothed in a huge unwieldy case.

I think we have discovered the perfect case which offers practical protection from scuffs and scratches whilst being carried, to enabling its natural beauty to be showcased whenever in use.

This is the Encase designed pouch in a charcoal wool finish. Snug, sleek and very well protected.

More iPad Mini cases can be found online here.

Energy to Go

... is what is said on the box!

This Energizer battery pack, originally designed to recharge iPhones, iPads, iPods or any other device requiring a USB charging adaptor. It's a very small and light power pack which has two USB ports on one side. This means it can charge two devices simultaneously. This photo shows me using the Energizer pack to power the Raspberry Pi computer. 

I have plans to be able to power a Raspberry Pi computer in a remote location, where mains power isn't available, for example on my allotment, and use the Pi to monitor environmental conditions, such as temperature, rainfall, sunlight and humidity. I'm currently running tests to see what the expected battery life is for the Energizer power pack. I'll post the results of these tests on my blog in due course. I do know that it will power the Raspberry Pi for 8 hours quite comfortably.


I've also used this power pack to charge up my iPhone and iPad mini. it's really effective and because it is light, doesn't' add any significant weight to my shoulder bag.

Would definitely recommend getting one of these, especially if you have a smartphone that requires charging at least once a day. 

Find it online under the iPad mini accessories page on the Mobile Fun site.

(Just another brick in ...) The Wonder Wall

Tonight is TeachMeet night, at the BETT 2013 show. It's a complete sell-out, and was within minutes of the tickets going live.

It also appears that there are many presenters too, more speakers than there this is time for them all to present. The random speaker selector engine will be in full swing this evening.

My nano presentation (that'll be just 2 minutes then) is all prepared and can be downloaded from here.

I'll be sharing how I have used a blogging tool and how posting an entry via an email is a really simple way of capturing a photo and posting some text online to celebrate a child's achievement. I've called this the Wonder Wall.

Whether I'm chosen to present tonight or not, you can probably get the gist of what I'm talking about from here.

(Just another brick in...) The Wonder Wall (PPT)


To Dock or not to Dock...

This Apple iPhone 5 dock from Mobile Fun is one of the first sporting the new Lightning Connector. When I travelled to Las Vegas during Christmas, I noticed that Bose have launched a speaker system incorporating the new dock connector too. 

The dock comes with a Lightning cable which is very handy as it provides another cable - useful when you rely on just the one that came with the phone.

I'm pleased that the dock is heavy enough to make it feel quite solid, yet light enough to pack away and travel with.

The only criticism is the lack of support for the iPhone 5 when it's sitting on the connector. The iPhone is reliant on the support from the connector - which just isn't man enough. It's really very flimsy and will, at some point, break. The dock probably needs a support behind the connector to take the weight of the phone. Time will tell.

#SLTChat - Sundays from 8pm

Twitter really can be one of the best forms of CPD that teachers and senior leaders can access and engage with. This evening I participated in the weekly #SLTChat session hosted by Ross McGill (@teachertoolkit)

Throughout the hour-long twitter session, several questions are posted by Ross to which fellow Twitter followers respond with their views. The evening became a mass of tweets which interestingly enough shakes out to form a cohesive discussion. I was pretty unsure at first how to make sense of dozens of tweets being posted within seconds of each other. Of course, each post is limited to 140 characters, so there's actually not a lot to read. However, synthesizing the sheer amount of data coming from a range of people offering some quite diverse viewpoints was at times difficult to follow.

One tool that was certainly well worth its weight in gold was TweetDeck, without which I'd have really struggled. I personally use the Twitter app on a daily basis, but it simply isn't up to the job of following a range of tweets with a specific hash tag.

TweetDeck allows you to create 'columns' each displaying a specific feed, meanwhile maintaining the timeline of all tweets from those your follow, alongside messages, interactions etc. I set one column to display #SLTChat tweets. I did end up using Twitter app for contributions to the chat. What TweetDeck really needs is a 'new tweet' button which creates a new tweet containing the hash tag of the discussion you are following. This would save quite a bit of time when posting.

Tonight's agenda was centred firmly around Gove's plans to introduce the EBAC, eradicating GCSEs and marginalising the creative, foundation subjects. Of course it's a much bigger argument than my simple summary. You can read the whole #SLTChat debate here.

Get online next Sunday evening, 8pm sharp. Install TweetDeck meantime, and I'll see you online.


Docking needn't be so hard: Lightning Adaptor anyone?

Despite being a through and through Apple fan, devotee, geek(!) I still feel slightly annoyed at the continual changing of cables and connectors, not least because of the sheer expense at replacing cables, connectors and the inconvenience of not having a wealth of the right cables at any given moment. Having recently upgraded my iPhone 5, I, of course, got heaps of 30-pin cables, which are of less use right now. Please form an orderly queue....

Then there are the devices that actually HAVE the 30-pin connector built right into them. I have an Alarm-Clock with the 30-pin iPhone dock connector and also a Phillips docking speaker system with the same connector. Not much can be done here other than use an adaptor. Not great, but a solution nevertheless.

It's not necessarily pretty either, but it does do the job. Sound quality is uninhibited and this is still an iPhone 5 charger too. My wife's iPhone 4 can still be used in the docking speaker as well. Maybe the best of both worlds?

Categories:

a-JAYS headphones for tangle-free listening to iPhone, iPad, iPod Touch

These a-JAYS are unusual in that I wouldn't have chosen the brand ordinarily. I'd have opted for more familiar, bigger brands such as Sony, JVC etc.

However, I was completely taken by surprise at how brilliant the sound quality both in range and depth. These in-ear headphones are perfect size and help to block ambient sound leaving the purity of the sound resonating from the ear pieces.

Bass sounds were particularly delightful.

The cables running to each ear piece are fairly unique too. a-JAYS have opted for a wide flat cable to avoid horrid tangles. It seems to work too. There is nothing more frustrating than reaching for headphones only to spend a good couple of minutes untwisting and untangling cable. These really work and I wouldn't hesitate in purchasing another set in the future.

These headphones are perfect for listening to iPod Touch, iPad, iPhone, Kindle Fire. There are other Kindle Fire HD accessories...

Categories:

TeachMeet Essex (Chelmsford) - the home of professional CPD for teachers

I'm now very proud to have attended a TeachMeet Essex session held in Chelmsford, Essex. The host school, King Edward Grammar School (www.kegs.org.uk) was an amazing venue with its large tiered seating in the main hall. A delicious range of food had been prepared by the students themselves.

Nearly 200 teachers arrived for the 6pm start, with 20 presenters prepared to speak for 7 minutes (micro presentation) or 2 minutes (nano presentation.) The thing is, the batting order is entirely randomised through the use of the 'speaker fruit machine' - you only had a moments notice. Interesting.

The quality of the speakers was staggering and I would challenge anyone who could find another CPD event that could match the passion, dedication, knowledge, relevance shared, in just the 2.5 hours we had tonight.

I spoke about the use of the Raspberry Pi in the Primary Curriculum. This is a project that I'm already developing with Helena Gillespie at University of East Anglia. I'm also teaching our Year 5 & 6 cohort, programming using a range of programming environments, such as Scratch and Python.

If you are interested in what I said, you might like to look at my presentation (slides)

and / or

Watch the (then) streamed version of all the presentations at TeachMeet Essex

Finally, here is the Computer Science: A curriculum for schools document that I referred to at the end of my talk. This document was written by the Computing at School Working Group in March 2012. It is incredibly decisive and outlines the entire Computer Science curriculum for Key Stages 1, 2, 3 and 4. Well worth a read.

Download YouTube content in Mac OS X Mountain Lion, Safari and other browsers

There's always been a longing to be able to download clips from the ever popular YouTube site. It seems that YouTube continually change their web interface which restricts various tools from being able to download content. I've been using Tooble for some months, but it appears that this tool no longer works for downloading YouTube content.

I have since found FastestTube which is a plugin for all the popular browsers, Safari, Google Chrome, FireFox, Opera and Internet Explorer.

Download it now, install and get downloading from YouTube. It'll take just a few moments.

Pages

Subscribe to RSS - Jonathan's blog